KWops - Identity
Introduction
It’s often necessary for resources and APIs published by a service to be limited to certain trusted users or clients. The first step to making these sorts of API-level trust decisions is authentication. Authentication is the process of reliably verifying a user’s identity. In microservice scenarios, this is typically handled centrally in a microservice dedicated to managing the identity of the users of the system. We will call this the "Identity" service from now on.
When working with RESTful endpoints, authentication is done using bearer tokens issued by the identity service. Client applications retrieve a bearer token from the identity service using the OpenID Connect (OIDC) protocol. When a client calls an api, its sends the bearer token in the Authorization header. The api then verifies the bearer token.
Step 1: Add Identity microservice
We will use the IdentityServer framework from Duende software to create an ASP.NET Core application that can handle login logic and workflow using the OpenID Connect protocol. This application will be the "Identity" microservice.
To better understand what we will do next, it is recommended to read about the "Fundamentals" described in the IdentityServer docs. The next part of the lab is based on the quickstart guide of "IdentityServer".
-
In the file system, create a physical folder "Identity" in the "Services" folder
-
Open a command prompt at this location
-
Install Duende.IdentityServer project templates:
dotnet new install Duende.IdentityServer.Templates -
Add a ASP.NET Core Razor Pages project using the "isinmem" template:
dotnet new isinmem -n Identity.UI-
This command adds basic IdentityServer functionalities and a basic user interface (most importantly, a login page).
-
-
-
Open the KWops solution in Visual Studio
-
Add an Identity solution folder under Services
-
Right click on the Identity folder. Select Add and then Existing project. Add the generated Identity.UI project.
-
Update the Duende.IdentityServer NuGet package to the latest stable version (without known vunerabilities).
-
Because of this update, you will have to replace all
using IdentityModel;statements in the project withusing Duende.IdentityModel;
-
-
-
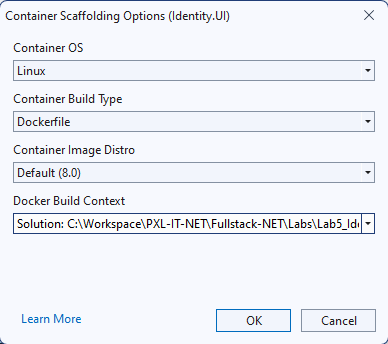
Add Docker support for the Identity.UI project.
-
Select the default image Distro and use the solution as the Docker build context.
-
-
Add Container orchestrator support for the Identity.UI project, like we have done in the first lab.
-
The
identity.uiservice is automatically added to docker-compose.yml and docker-compose.override.yml. Alter the override file so that the identity service is accessible from port 9000 (http) and 9001 (https) on the host machine.
-
-
In the "Identity.UI" project:
-
Disable key management and use developer signing credentials in "HostingExtensions.cs":
HostingExtensions.csvar isBuilder = builder.Services.AddIdentityServer(options => { ... // prevent automatic key management // see: https://docs.duendesoftware.com/identityserver/fundamentals/key-management/ options.KeyManagement.Enabled = false; }) .AddTestUsers(TestUsers.Users); isBuilder.AddDeveloperSigningCredential(); // not recommended for production - you need to store your keys somewhere secure-
This way we don’t have to worry about key management and can use the developer signing credentials. This is not recommended for production environments!
-
-
Comment out the
AddGooglemethod call in "HostingExtensions.cs" (but keep theAddAuthenticationcall):HostingExtensions.csbuilder.Services.AddAuthentication(); //.AddGoogle(options => //{ // options.SignInScheme = IdentityServerConstants.ExternalCookieAuthenticationScheme; // // register your IdentityServer with Google at https://console.developers.google.com // // enable the Google+ API // // set the redirect URI to https://localhost:5001/signin-google // options.ClientId = "copy client ID from Google here"; // options.ClientSecret = "copy client secret from Google here"; //});-
Note that the
ConfigureServicesmethod ofHostingExtensionsis called from Program.cs
-
-
Comment out the first lines in the
OnGetmethod of theDiagnasticspage model in the Pages/Diagnostics folder. That code won’t work when the application is running inside a container.Index.cshtml... public async Task<IActionResult> OnGet() { //var localAddresses = new string[] { "127.0.0.1", "::1", HttpContext.Connection.LocalIpAddress.ToString() }; //if (!localAddresses.Contains(HttpContext.Connection.RemoteIpAddress.ToString())) //{ // return NotFound(); //} View = new ViewModel(await HttpContext.AuthenticateAsync()); return Page(); } ...
-
-
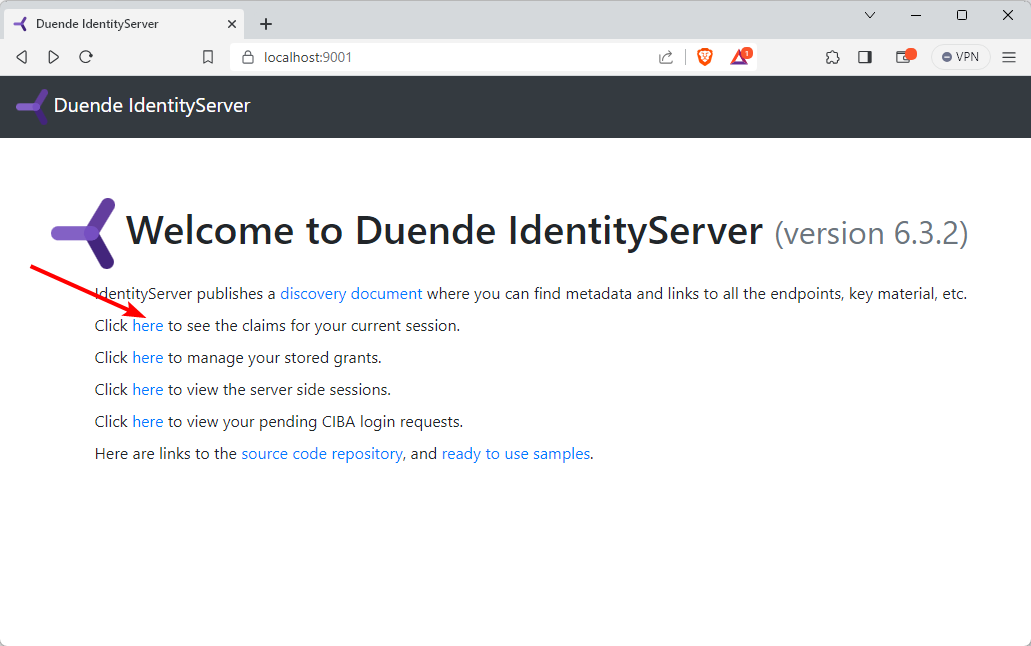
Start the application using Docker compose. Navigate to https://localhost:9001
-
Click on the link to see the claims for your current session.
-
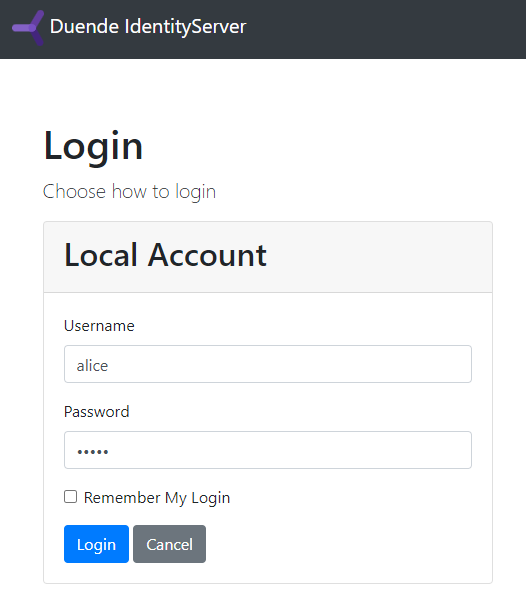
Login with one of the test users (alice, bob):
-
The test users can be found in the
TestUsersclass in the Pages folder. You can find the id, username and password of the users. You can also see the claims that are known to be true for those users. If you want to, you can add your own users here. The testusers are added to the system because of theAddTestUsersextension method call in HostingExtensions.csOf course, in a production application, the users would not be hardcoded in a class, but stored in a database. In that case you might want to check out the Entity Framework Core quickstart guide and the Using ASP.NET Core Identity quickstart guide, but this is out of scope for this lab.
-
-
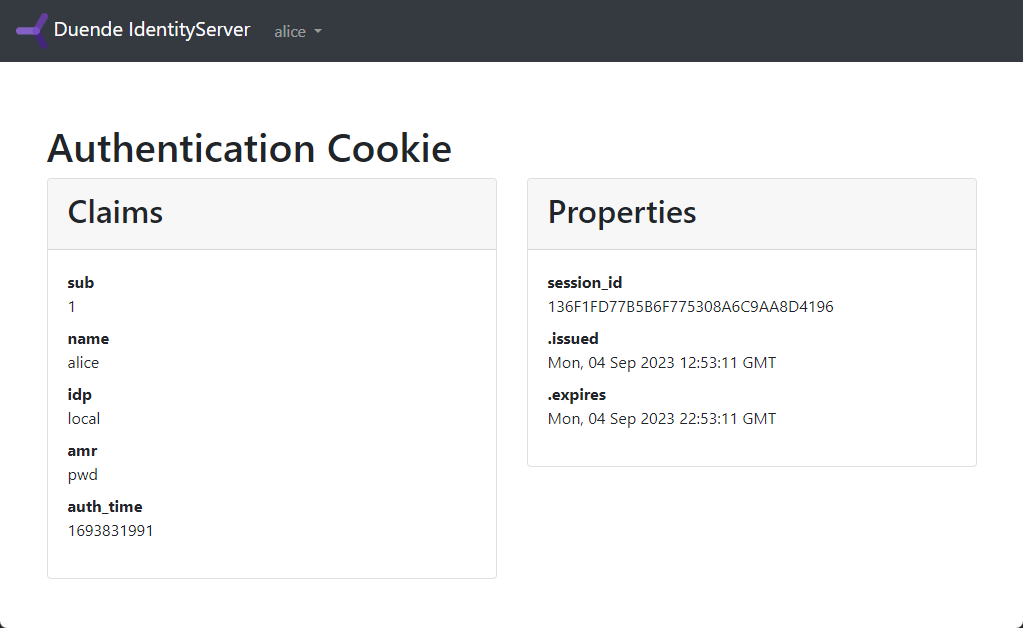
After the login, you should see the requested claims of the user together with properties of the issued cookie:
-
Step2: Configure Identity microservice
In the next step we will create a console application that can call the HR and DevOps api’s. Those api’s will be secured soon.
First we need to define the resources that need protection. Therefore we will define 3 api scopes:
-
devops.read: read access on the DevOps api -
hr.read: read access on the HR api -
manage: write access (in general)
So the ApiScopes property in the Config class of the "Identity.UI" project should look like this:
public static IEnumerable<ApiScope> ApiScopes =>
    new ApiScope[]
    {
        new ApiScope("devops.read", "Read access on DevOps Api"),
        new ApiScope("hr.read", "Read access on HumanResources Api"),
        new ApiScope("manage", "Write access")
    };
When the scopes are defined, the Api resources can be defined. Add a new static property ApiResources:
public static IEnumerable<ApiResource> ApiResources =>
    new List<ApiResource>
    {
        new ApiResource("devops", "DevOps API")
        {
            Scopes = { "devops.read", "manage" },

        },
        new ApiResource("hr", "Human Resources API")
        {
            Scopes = { "hr.read", "manage" }
        }
    };
As you can see, the manage scope is linked to both api resources.
Now you need to add these resources: in the ConfigureServices method of HostingExtensions, add a call to isBuilder.AddInMemoryApiResources:
...
// in-memory, code config
isBuilder.AddInMemoryIdentityResources(Config.IdentityResources);
isBuilder.AddInMemoryApiScopes(Config.ApiScopes);
isBuilder.AddInMemoryClients(Config.Clients);
isBuilder.AddInMemoryApiResources(Config.ApiResources); // Add this line!
...
Now we must register the console application as a client in de Identity service. The console client application should use the OIDC protocol with code flow.
The Clients property in the Config class should look like this:
public static IEnumerable<Client> Clients =>
new Client[]
{
        new Client
        {
            ClientId = "kwops.cli",
            ClientName = "KWops Command Line Interface",
            ClientSecrets = { new Secret("SuperSecretClientSecret".Sha256()) },
            AllowedGrantTypes = GrantTypes.Code,
            RedirectUris = { "http://localhost:7890/" },
            AllowOfflineAccess = true,
            AllowedScopes = { "openid", "profile", "devops.read", "hr.read" }
        }
};-
The client gets an id (kwops.cli) and a secret (SuperSecretClientSecret).
-
By setting the
AllowedGrantTypesto code, the client must use the code flow when requesting a token. -
The
RedirectUrisproperty contains the urls to which the user will get send back to after logging in. The authentication code that is needed to retrieve a token, will be sent to the redirect url. -
By setting
AllowOfflineAccessto true, the client can also receive a refresh token (out of scope for this course). -
The
AllowedScopeslist, contains the scopes that the client is allowed to request. By excluding themanagescope, the console application will not be able to get write access to our api’s.
Step 3: Secure the DevOps api
KWSoft wants the DevOps api secured in the following way:
-
all endpoints (controller actions) are only accessible for an authenticated user.
-
all endpoints are only accessible for client applications that have access to the
devops.readscope. -
endpoints that allow to change the state of the system (write actions) are only accessible for client applications that have access to the
managescope.
Let’s pour this in code:
-
Add an "Urls" section in "appsettings.json" of the "DevOps.Api" project:
appsettings.json"Urls": { "IdentityUrlBackChannel": "https://localhost:9001", "IdentityUrlFrontChannel": "https://localhost:9001" }-
These urls point to the "Identity" service. There are 2 different url’s to point to the "Identity" service.
-
Backchannel URL (IdentityUrlBackChannel): this URL is used internally within the system, specifically by services like the "devops.api" container, to communicate directly with the "Identity" service. The backchannel is typically secured, not exposed to external clients, and often used for server-to-server communication within the internal network.
-
Frontchannel URL (IdentityUrlFrontChannel): this URL is intended for external clients, such as browsers or console applications, to access the "Identity" service. The frontchannel is exposed to users outside the system.
-
The url of the "Identity" service from within the "devops.api" container is http://identity.ui (the name of the identity container). So in "docker-compose.override.yml" override the IdentityUrl value by setting an environment variable:
docker-compose.override.ymldevops.api: environment: - ASPNETCORE_ENVIRONMENT=Development - ASPNETCORE_HTTP_PORTS=8080 - ASPNETCORE_HTTPS_PORTS=8081 - ConnectionStrings__DefaultConnection=Data Source=sqldata;Database=KWops.DevOps;User Id=sa;Password=Pass@word;TrustServerCertificate=True; - EventBus__RabbitMQ__Host=rabbitmq - Urls__IdentityUrlBackChannel=http://identity.uiImportantNotice how a double underscore (_) is used to set a setting (_IdentityUrl) within a section (Urls).
-
-
-
To make sure the application looks for bearer tokens in the Authorization header of each incoming request, register and configure the services for authentication in the DI container. You will need to install the nuget package
Microsoft.AspNetCore.Authentication.JwtBearerandMiscrosoft.IdentityModel.JsonWebTokens(the latest 8 version):Program.cs... builder.Services.AddAuthentication(JwtBearerDefaults.AuthenticationScheme) .AddJwtBearer(JwtBearerDefaults.AuthenticationScheme, options => { string identityBackChannelUrl = builder.Configuration.GetValue<string>("Urls:IdentityUrlBackChannel")!; options.Authority = identityBackChannelUrl; options.Audience = "devops"; options.RequireHttpsMetadata = false; options.TokenValidationParameters = new TokenValidationParameters { ValidateIssuer = false, //HACK: the code below bypasses validating the signature of the JWT token. DO NOT DO THIS IN REAL LIFE APPLICATIONS! // This is done because in the libraries used to generate and handle tokens must be exactly the same version. // The fix proposed in https://docs.duendesoftware.com/identityserver/v7/troubleshooting/wilson/ did not work, // so we decided to bypass the signature validation. SignatureValidator = (string token, TokenValidationParameters parameters) => { var jwt = new JsonWebToken(token); return jwt; } }; options.Events = new JwtBearerEvents { OnAuthenticationFailed = context => { var logger = context.HttpContext.RequestServices.GetRequiredService<ILogger<Program>>(); logger.LogWarning(context.Exception, "Bearer token authentication failed"); return System.Threading.Tasks.Task.CompletedTask; }, OnForbidden = context => { var logger = context.HttpContext.RequestServices.GetRequiredService<ILogger<Program>>(); Exception? failure = context.Result?.Failure; if (failure is not null) { logger.LogWarning(failure, "Bearer token authorization failed"); } else { logger.LogWarning("Tried to access forbidden resource"); } return System.Threading.Tasks.Task.CompletedTask; } }; }); var app = builder.Build(); ...-
Let’s breakdown what is happening in this code:
-
builder.Services.AddAuthentication(JwtBearerDefaults.AuthenticationScheme): this setsbearer(JwtBearerDefaults.AuthenicationScheme) as the default scheme. This will make the application look for a bearer token in the Authorization header by default (instead of looking for a cookie, for example). -
options.Authority = identityBackChannelUrl: this (backchannel) url is used to validate the signature of the bearer token. Via the url[identityBackChannelUrl]/.well-known/openid-configurationthe public key is retrieved from the "Identity" service which can then be used to verify the signature.TipTry to surf to https://localhost:9001/.well-known/openid-configuration yourself to see the information that the "Identity" service is exposing. Of course the "Identity" service needs to be running for this. -
options.Audience = "devops": the "Identity" service will add the name of the api resource that was requested in the token as an audience the token is meant for. By setting the Audience property, the api checks if the token that is received is meant for the devops audience. -
options.RequireHttpsMetadata = false: the communication that happens when the devops.api container retrieves the signing certificate from the identity.ui container, cannot happen via https because we did not configure the ssl certificates. So we do not require that this communication must go via https. -
Setting the
TokenValidationParameters: the application must not validate the issuer of the token. This is because the "Identity" service sets the issuer to https://localhost:9001 which does not match the Authority url we use (http://identity.ui). Also, the signature of the token is not validated. This is because the libraries used to generate and handle tokens must be exactly the same version. The fix proposed in https://docs.duendesoftware.com/identityserver/v7/troubleshooting/wilson/ did not work, so we pragmatically decided to bypass the signature validation. -
options.Events: here we define what should happen when the authentication fails or when the user is not allowed to access a resource. In this case we log a warning message.
-
-
-
Add a filter that a enforces all controller actions to have an authenticated user that has a "scope" claim with the value "devops.read":
Program.csvar readPolicy = new AuthorizationPolicyBuilder() .AddAuthenticationSchemes(JwtBearerDefaults.AuthenticationScheme) .RequireAuthenticatedUser() .RequireClaim("scope", "devops.read") .Build(); builder.Services.AddSingleton(provider => new ApplicationExceptionFilterAttribute(provider.GetRequiredService<ILogger<ApplicationExceptionFilterAttribute>>())); builder.Services.AddControllers(options => { options.Filters.AddService<ApplicationExceptionFilterAttribute>(); options.Filters.Add(new AuthorizeFilter(readPolicy)); }); ...-
First a policy is created. The policy states that it is a policy for bearer tokens that requires the client to be authenticated and have a claim
scopein the token with valuedevops.read. -
Then the policy is used to add an
AuthorizeFilternext to theApplicationExceptionFilteryou already added in the second lab.
-
-
Define a (second) policy that can be used to secure controller actions that need write access. Add that policy to the DI container:
Program.cs... var writePolicy = new AuthorizationPolicyBuilder() .AddAuthenticationSchemes(JwtBearerDefaults.AuthenticationScheme) .RequireAuthenticatedUser() .RequireClaim("scope", "manage") .Build(); builder.Services.AddAuthorization(options => { options.AddPolicy("write", writePolicy); }); ...-
The policy requires a user to be authenticated and have a
scopeclaim with the valuemanage. -
The policy is registered in the DI container with the name
write.
-
-
Secure the
AssembleTeamaction method of theTeamsController. Enforce thewritepolicy for this action method:TeamsController.cs[ApiController] [Route("[controller]")] public class TeamsController : ControllerBase { ... [HttpPost("{id}/assemble")] [Authorize(policy:"write")] public async Task<IActionResult> AssembleTeam(Guid id, TeamAssembleInputModel model) { ... } }
You will now get 401 (Unauthorized) responses from the api when you use the Swagger client application.
Step 4: Secure the HR api
Repeat the actions of the previous step for the Human Resources api.
Also define a read policy and a write policy. Enforce the read policy on all action methods and the write policy on the Add and Dismiss actions of the EmployeesController.
Step 5: Create a native client
Now we will create the client application that was configured in the "Identity" service. The client application is a (dummy) console application. It is a command-line interface to communicate with the devops and hr api’s.
-
Download the KWops.Cli project from blackboard.
-
In the file system, add a Clients folder next to the Services and SharedKernel folders.
-
In the file system, copy the KWops.Cli folder in the Clients folder.
-
In VS, add a solution folder Clients.
-
In VS, right click on the Clients solution folder. Choose "Add" → "Existing Project…". Navigate to the "csproj" file of the KWops.Cli project and select it.
Without going into too much detail, we will explain the concepts in the project you just added:
-
Program.cs
-
When a key is pressed, the OIDC protocol is used to retrieve an access token from the "Identity" service. The
OidcServiceclass contains the necessary logic to achieve this. -
When the access token is retrieved, it is used to get some data from the devops api. The
DevOpsApiClientclass contains the necessary logic to achieve this. -
When a key is pressed, the application closes.
-
-
OidcService.cs
-
Makes use of the Duende.IdentityModel OIDC Client. This is a NuGet package that contains an
OidcClientclass that implements the OAuth2 / OIDC protocol. It can be used in all sorts of .NET native applications like a console application or mobile application (Maui). -
Uses the manual mode to open a browser window to redirect the user to the "Identity" service. After the user has proven its identity in with the "Identity" service, the "Identity" service sends (redirects) the user to "http://localhost:7890" with an authentication code.
-
When the user is redirected to the "Identity" service, the following information is delivered to the "Identity" service via query paramters in the url (
OidcClientOptions):-
Authority → url of the "Identity" service
-
ClientId, ClientSecret → the id and secret of the client as registered in the "Identity" service.
-
Scope → the scopes that we request. The
openid(mandatory) andprofilescopes will make sure certain claims can be found in the identity token (sub (user identifier), name, family_name, given_name, website, …) -
RedirectUrl → The url to which the user is send back to after it has proven itself on the "Identity" website.
-
-
-
Let’s try it:
-
Start the microservices (docker-compose).
-
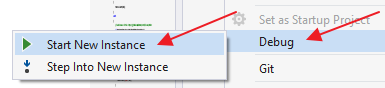
Right click on the "KWops.Cli" project. Select "Debug" and then "Start new instance".
-
Press any key. A browser window will open.

-
Take a look at the querystring of the url. It contains all the information that is passed from the client application (cli) to the "Identity" service.
-
-
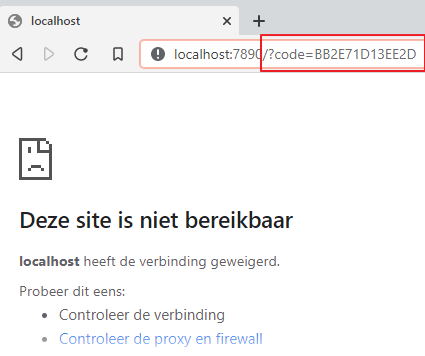
Login. You are now redirected to http://localhost:7890. The query string contains the code that the client (cli) can use to request an identity token and access token. Normally the console applications should be listening for requests on this address and automatically process it. In this lab we will do it manually.
-
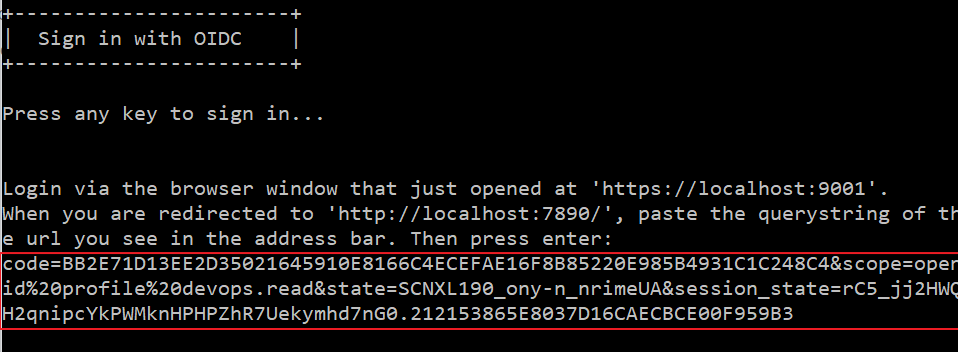
Copy the whole querystring (everthing after the question mark) and paste it in the console window. Press enter.
-
An identity token and an access token is retrieved from the "Identity" service (
ProcessResponseAsyncmethod). The claims in the identity token are printed in the console and the access token is printed in the console.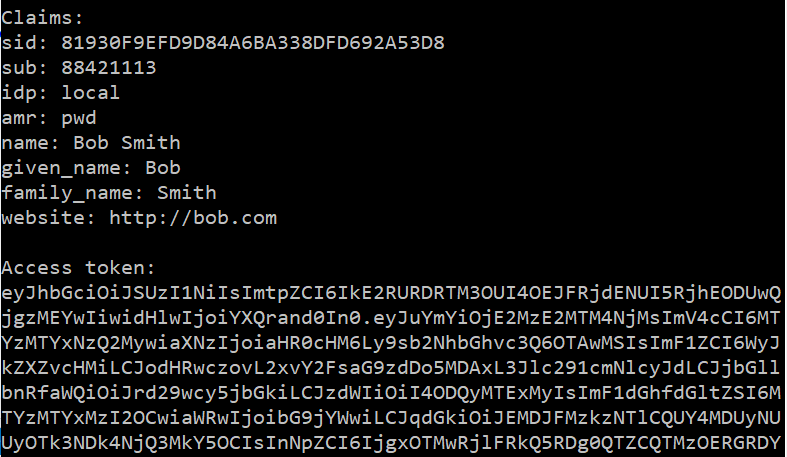
-
Then the access token is used to retrieve all teams from the DevOps api. The results are printed to the console window.
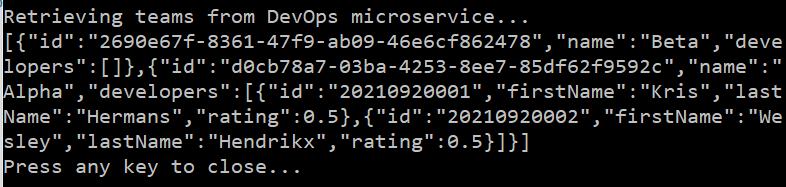
Step 6: Adjust swagger clients
There are actually 3 client applications in the solution now:
-
The KWops.Cli
-
The swagger ui application for the hr api (which is a client application that runs in a browser and makes calls to the api from within the browser)
-
The swagger ui application for the devops api
To be able to still use the swagger ui’s, some login functionality needs to be added so that a bearer token can be sent to the api when an endpoint is executed in the ui.
-
Register two more clients in the Identity service:
-
Add two more clients
Config.cspublic static IEnumerable<Client> Clients => new Client[] { new Client { ClientId = "kwops.cli", ClientName = "KWops Command Line Interface", ClientSecrets = { new Secret("SuperSecretClientSecret".Sha256()) }, AllowedGrantTypes = GrantTypes.Code, RedirectUris = { "http://localhost:7890/" }, AllowOfflineAccess = true, AllowedScopes = { "openid", "profile", "devops.read", "hr.read" } }, new Client { ClientId = "swagger.devops", ClientName = "Swagger UI for DevOps Api", AllowedGrantTypes = GrantTypes.Code, RequireClientSecret = false, RedirectUris = {"https://localhost:8001/swagger/oauth2-redirect.html"}, AllowedCorsOrigins = {"https://localhost:8001"}, AllowedScopes = {"devops.read", "manage"} } , new Client { ClientId = "swagger.hr", ClientName = "Swagger UI for Human Resources Api", AllowedGrantTypes = GrantTypes.Code, RequireClientSecret = false, RedirectUris = {"https://localhost:5001/swagger/oauth2-redirect.html"}, AllowedCorsOrigins = {"https://localhost:5001"}, AllowedScopes = {"hr.read", "manage"} } };-
Notice that the 2 swagger clients don’t have a client secret. When the redirect to the Identity service is initiated from a browser window (which will be the case for our swagger ui’s), it is not possible to get the client secret to that browser window in a secure way. For the Identity service to accept requests from the swagger clients, the
RequireClientSecretproperty is set tofalse. -
Notice the redirect uri that is set.
-
The
AllowedCorsOriginsproperty, makes sure that the Identity service will only accept requests coming from that url when authenticating a client. -
Notice the scopes that are allowed for each client.
-
-
-
Add the
Swashbuckle.AspNetCoreNuGet package to the Api project in the SharedKernel folder. -
Add a folder Swagger in the Api project.
-
Add a class
AlwaysAuthorizeOperationFilterin the Swagger folder:AlwaysAuthorizeOperationFilter.csusing Microsoft.OpenApi.Models; using Swashbuckle.AspNetCore.SwaggerGen; namespace Api.Swagger { public class AlwaysAuthorizeOperationFilter : IOperationFilter { private readonly string _securityScheme; private readonly string[] _scopes; public AlwaysAuthorizeOperationFilter(string securityScheme, string[] scopes) { _securityScheme = securityScheme; _scopes = scopes; } public void Apply(OpenApiOperation operation, OperationFilterContext context) { operation.Responses.Add("401", new OpenApiResponse { Description = "Unauthorized" }); operation.Responses.Add("403", new OpenApiResponse { Description = "Forbidden" }); operation.Security = new List<OpenApiSecurityRequirement> { new OpenApiSecurityRequirement { [ new OpenApiSecurityScheme {Reference = new OpenApiReference { Type = ReferenceType.SecurityScheme, Id = _securityScheme} } ] = _scopes } }; } } }-
This class will be used to enable authorization for all api endpoints in the swagger ui.
-
-
-
In the DevOps.Api project:
-
Add OAuth2 support by changing the options in the
AddSwaggerGenmethod in Program.cs:Program.cs... string identityUrl = builder.Configuration.GetValue<string>("Urls:IdentityUrlFrontChannel")!; builder.Services.AddSwaggerGen(c => { c.SwaggerDoc("v1", new OpenApiInfo { Title = "DevOps.Api", Version = "v1" }); string securityScheme = "OpenID"; var scopes = new Dictionary<string, string> { { "devops.read", "DevOps API - Read access" }, { "manage", "Write access" } }; c.AddSecurityDefinition(securityScheme, new OpenApiSecurityScheme { Type = SecuritySchemeType.OAuth2, Flows = new OpenApiOAuthFlows { AuthorizationCode = new OpenApiOAuthFlow { AuthorizationUrl = new Uri($"{identityUrl}/connect/authorize"), TokenUrl = new Uri($"{identityUrl}/connect/token"), Scopes = scopes } } }); c.OperationFilter<AlwaysAuthorizeOperationFilter>(securityScheme, scopes.Keys.ToArray()); }); ...-
Notice how the available scopes are set.
-
Notice that the frontchannel url of the "Identity" service is used to set the
AuthorizationUrlandTokenUrl. This is because the swagger ui will be running in a browser window. -
Notice how the
AuthorizationUrl(url used to request a code) and theTokenUrl(url used to retrieve tokens using a code) are set. These urls can be found at https://localhost:9001/.well-known/openid-configuration (returns info about the openId configuration of the "Identity" service).
-
-
Add login ui components to the swagger ui by changing the options in the
UseSwaggerUImethod in "Program.cs":Program.cs... if (app.Environment.IsDevelopment()) { app.UseSwagger(); app.UseSwaggerUI(c => { c.SwaggerEndpoint("/swagger/v1/swagger.json", "DevOps.Api v1"); c.OAuthClientId("swagger.devops"); c.OAuthUsePkce(); }); } ...-
Here we set the clientId that will be sent to the Identity service.
-
We also say that the more secure "Pkce" method should be used (adds an extra security check when retrieving tokens).
-
-
Do the same steps for the HumansResources.Api service. Pay attention to which scopes you define!
Now you can start the application and use the swagger ui’s to authenticate en communicate with the api’s.
The swagger ui now contains an "Authorize" button:
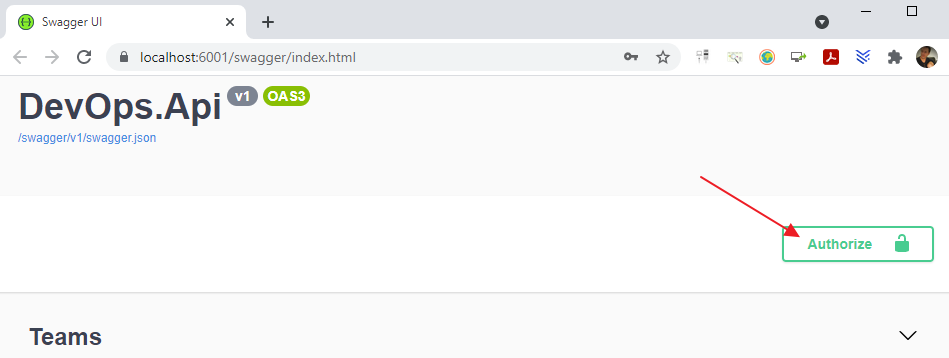
Click on the button and select the scopes you want to request (may only read access is sufficient?):
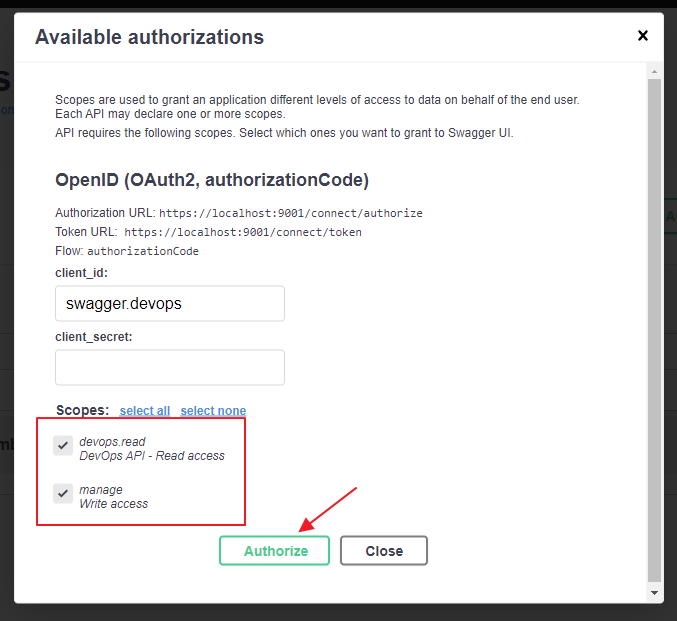
Prove who you are with the "Identity" service. After that the "Identity" service will send you back to the application (redirect url set in "Identity" service). The swagger ui processes the response and retrieves an access token.
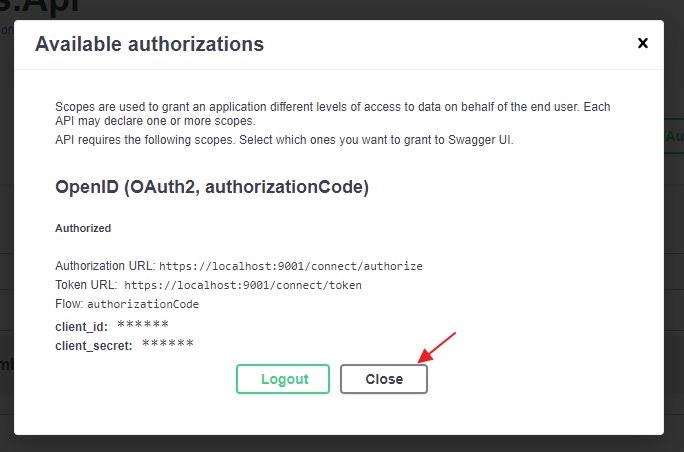
Click on the "Close" button. Now, the swagger ui will put the access token in the "Authorization" header of each request.